Para leer en Español click here
This shop has been compensated by Collective Bias, Inc. and its advertiser. All opinions are mine alone. #SnugHugs #CollectiveBias.
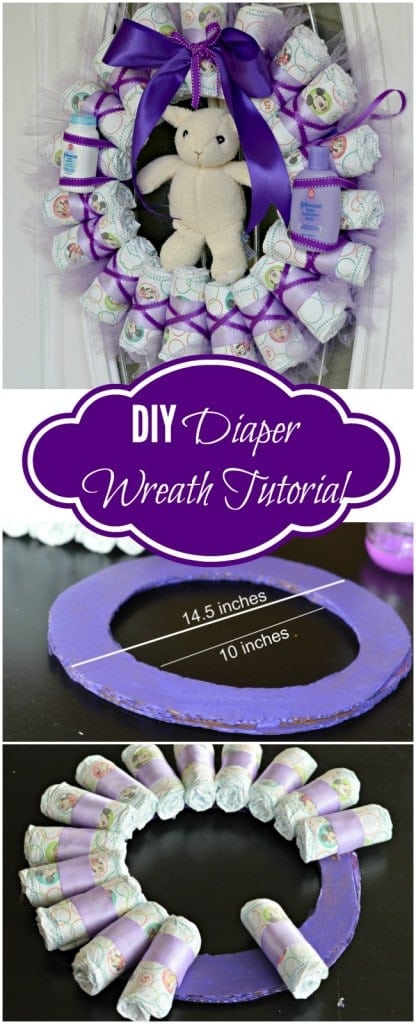
If you are looking for a creative idea for a baby shower gift, look no further. Today I will share with you how to make this diaper wreath, which aside from being inexpensive to make, is so cute and a great way to greet guests. Keep reading to learn how to make this fun diaper wreath!
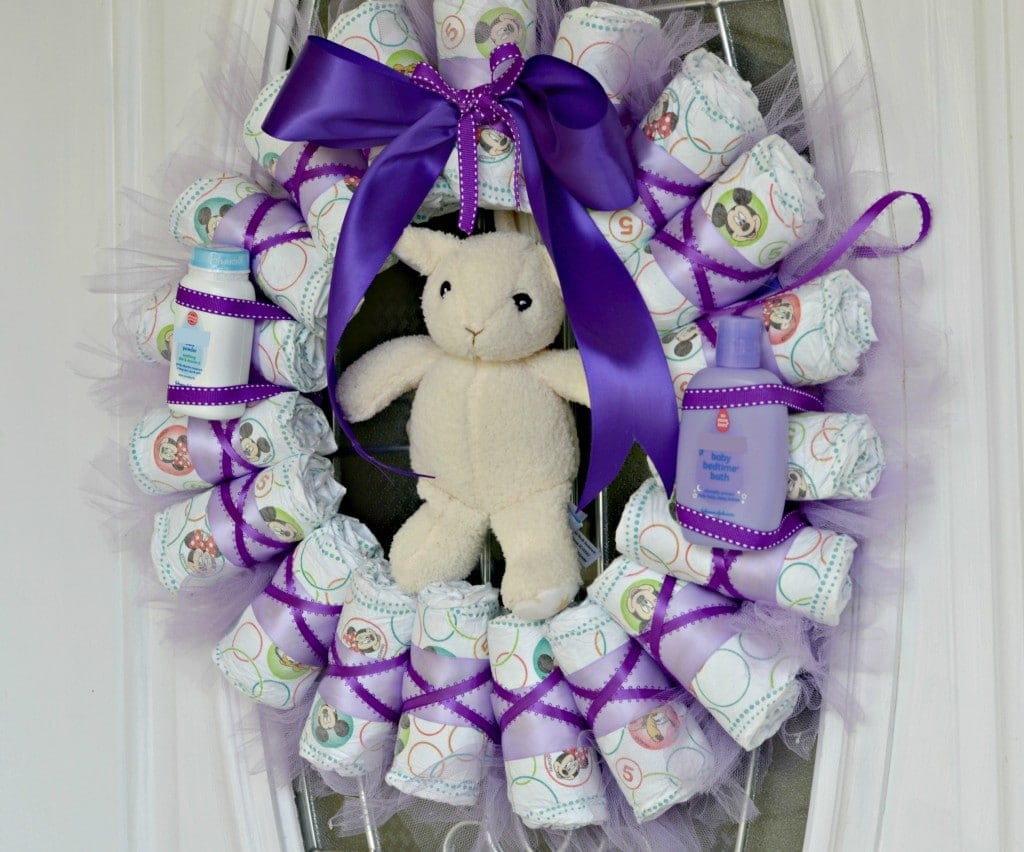
In a few days I will be celebrating the arrival of one of my best friend’s third baby, and I couldn’t be more excited for her and for this new addition to her family! When we found out that she was having a girl, we all divided up the work to organize the baby shower and I am in charge of some of the decorations, which I was thrilled about because I love doing that kind of stuff. For one of the decorations, I made this adorable diaper wreath with her favorite color! In this tutorial I will show you the basic steps on how to do this, but feel free to use your imagination to choose the colors and the little extras that will make it special!
Step 1
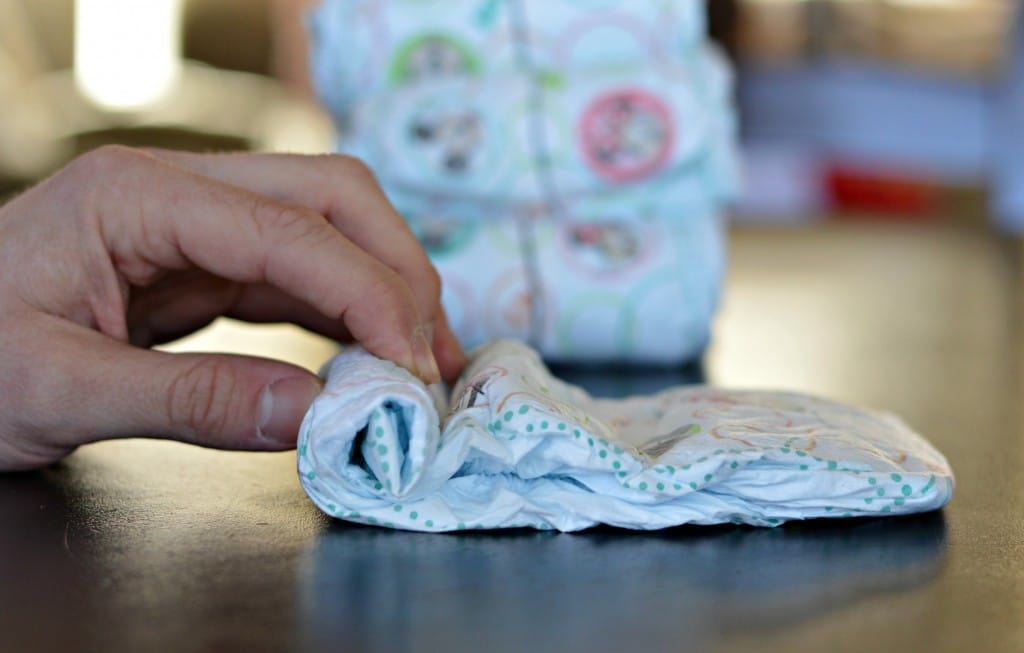
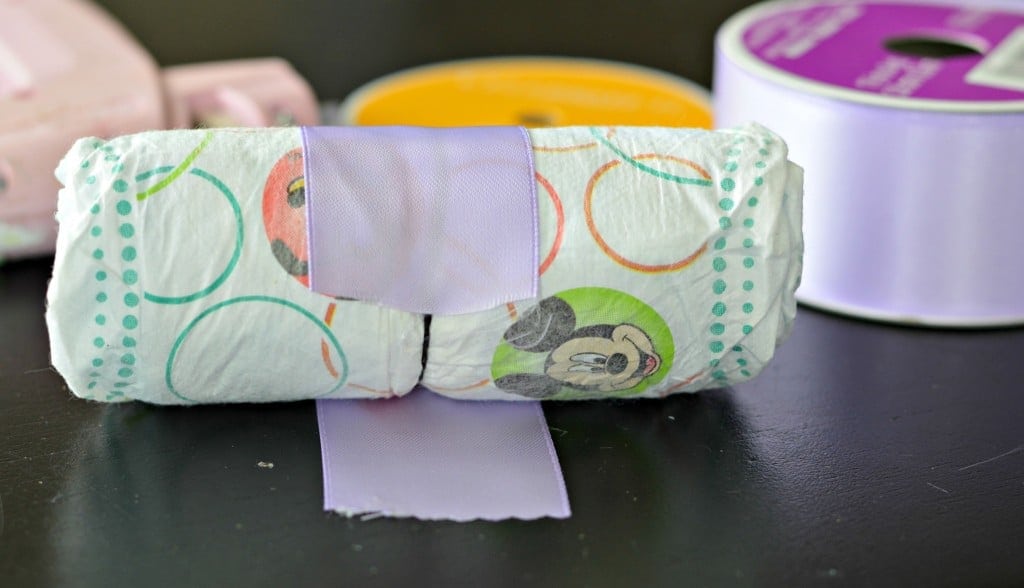
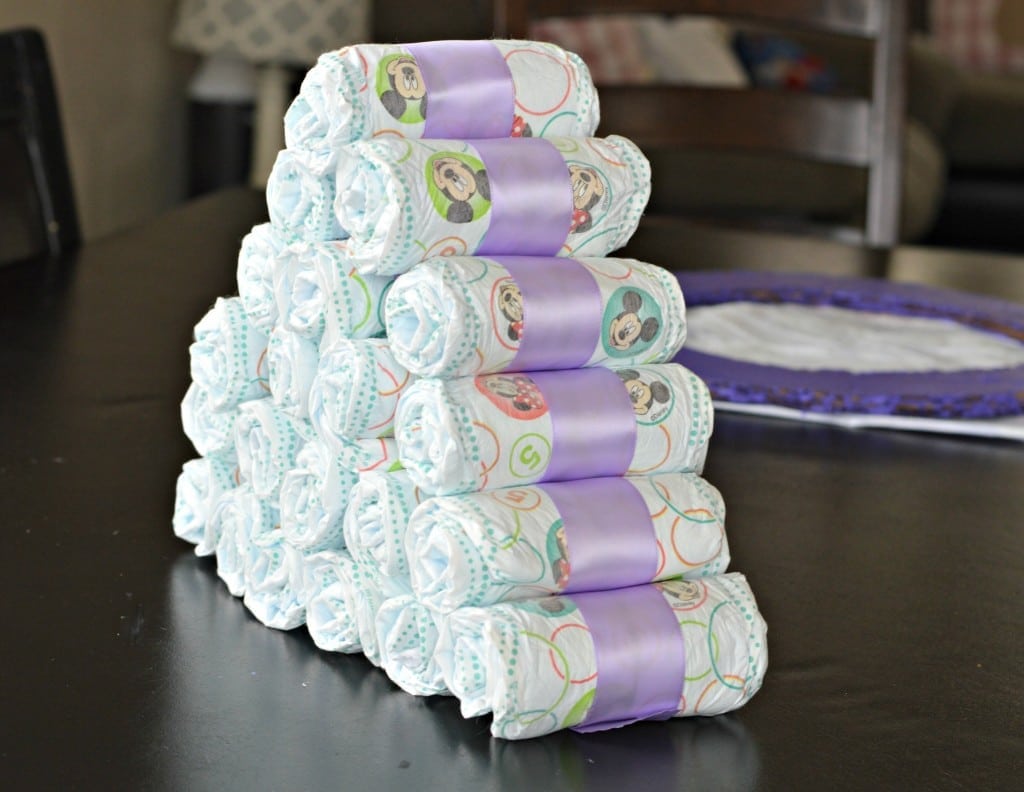
If you want to make the wreath the same size as mine, you will need at least 20 size 5 diapers. If you use a smaller size, you will probably need to use more. So buy a box, count out 20, and then roll each one up and wrap with a rubber band or a hair tie.
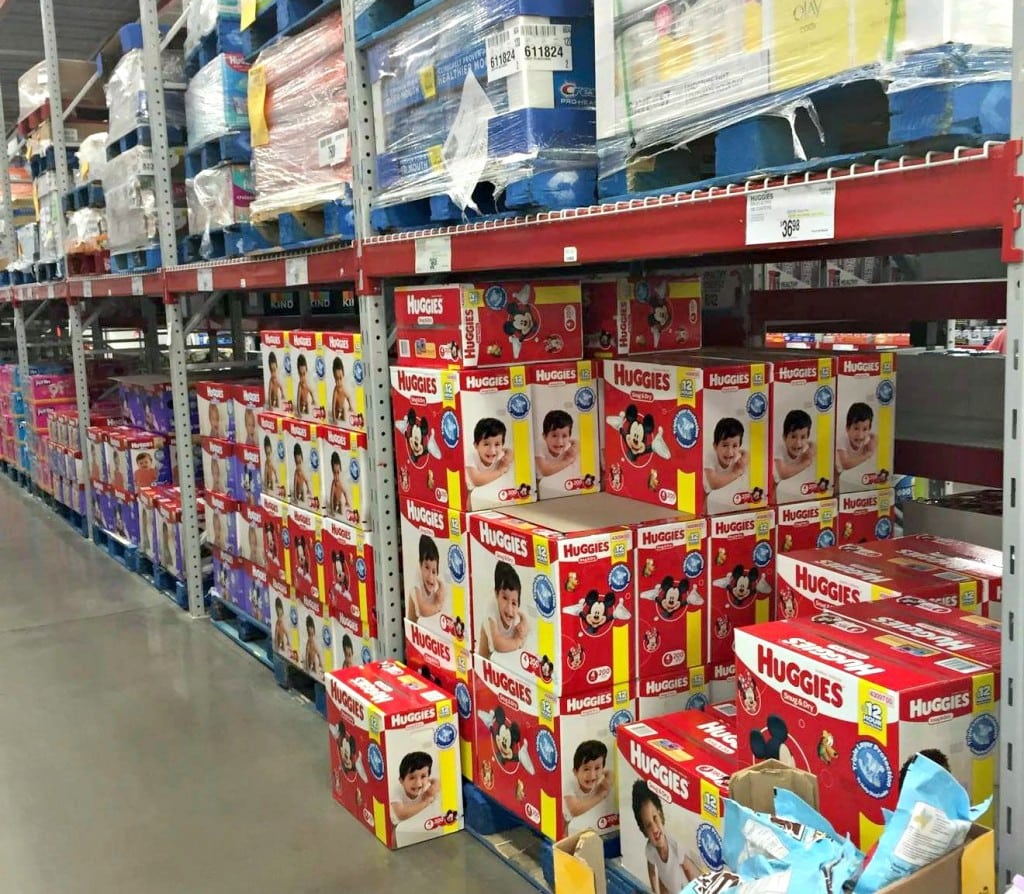
Since this is also a gift that can be used for the new baby, I wanted to use some high quality diapers. That is why I purchased Huggies Snug & Dry Diapers at Sam’s Club. The great thing is that when you go to Sam’s Club for Huggies Snug & Dry you save over $10. Even better – right now there is a great offer on Ibotta to save an additional $7 off Snug & Dry at Sam’s Club. I chose Huggies Snug & Dry because I know that they are reliable and they can be trusted to keep a baby’s skin dry. As a mom myself, I know how important that is.
Step 2
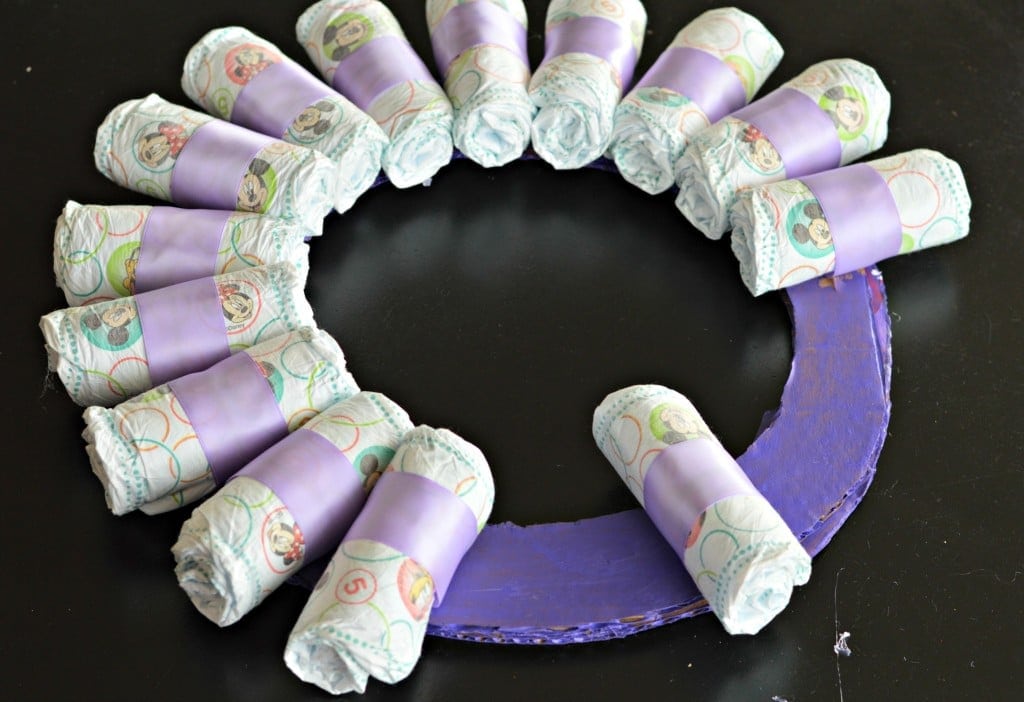
After all of the diapers are rolled up and wrapped in a rubber band or hair tie, you can then cut off small pieces of 1 1/2 inch ribbon, covering up the rubber band and gluing in place with a hot glue gun.
Step 3
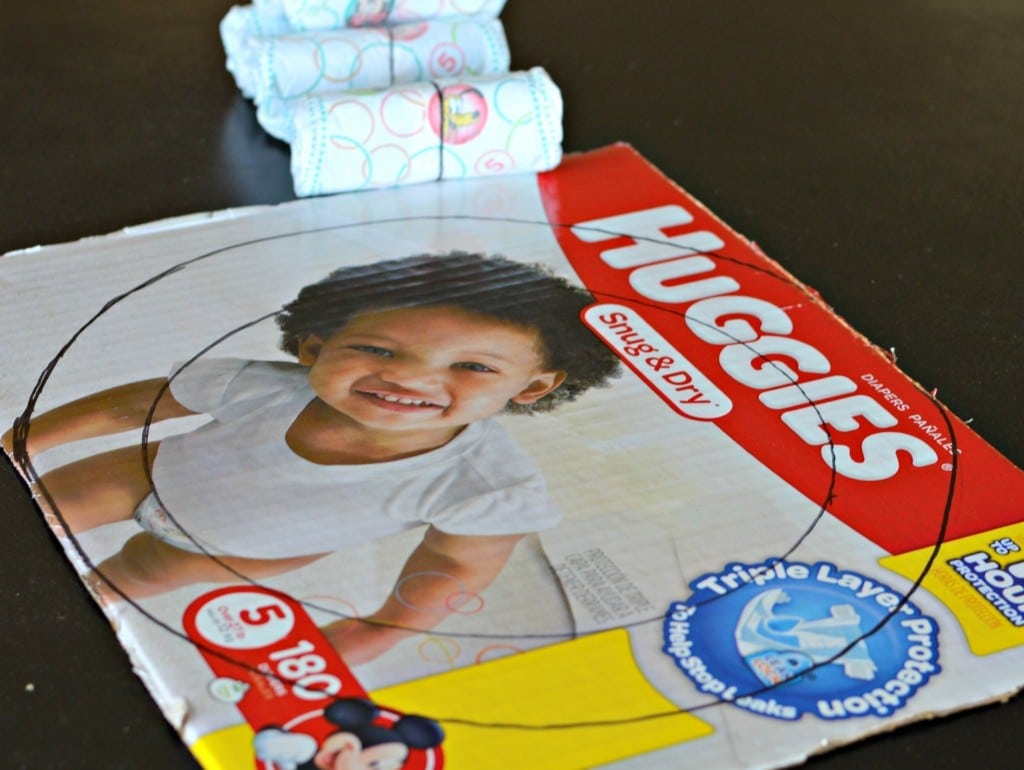
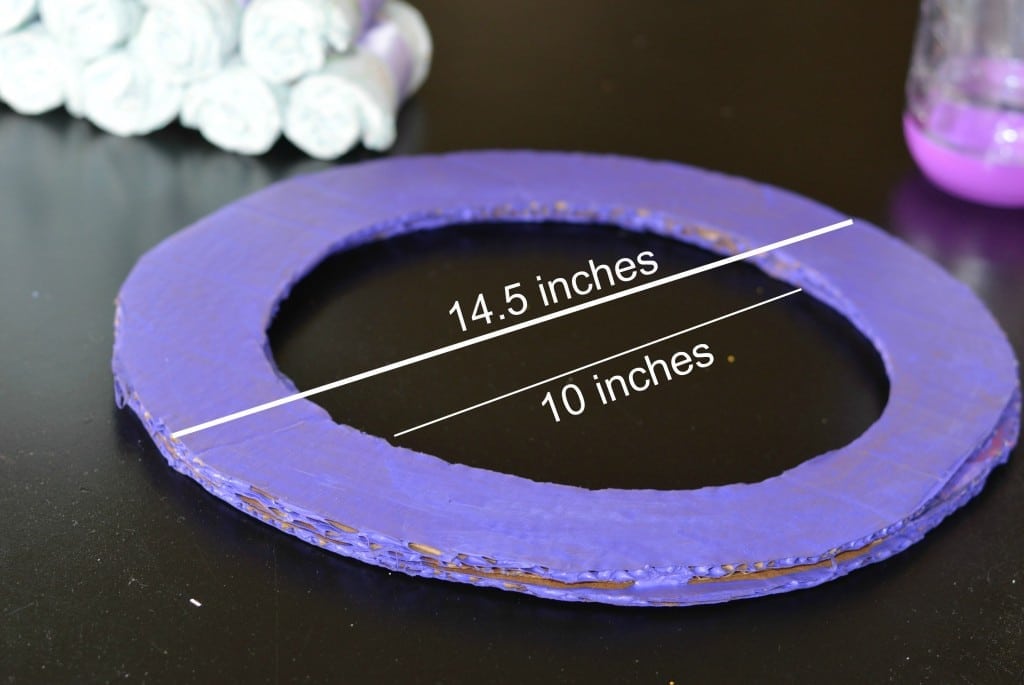
Now it is time to make the wreath base, using a cardboard box. I decided to save some money, so I used the same box that the Huggies Snug & Dry Diapers came in. Start by cutting out two separate rings to the correct size and then gluing them together so that the base is extra strong (see measurements below).

Step 4
Once they are glued together, paint them with your desired color of acrylic paint, preferably the same color as the ribbon that you bought. It is okay if the paint job isn’t perfect, because the inner rings will end up being covered anyway.
Step 5
After it is painted, start attaching each of the diapers one by one with the hot glue gun, trying not to leave much space between each diaper.
Step 6
Next, cut out some long strips of tulle and tie them together in knots in the spaces between the diapers. I used three strips of tulle in each space to cover up as much of the rings as possible. After all of the strips are tied together, you can cut off the excess pieces so that they are all about the same length.

Step 7
Now it is time to decorate using the thinner pieces of ribbon.
- Start by gluing one end of the ribbon on the back side of the cardboard ring.
- Pass the ribbon over and under in a diagonal form, being careful to make sure that the darker colored ribbon goes over the top of the lighter colored ribbon.
- Continue wrapping the ribbon around all in the same direction first until you have made your way around the entire wreath (see images below).
- Repeat the process going in the opposite direction so that the darker colored ribbons form an X over the top of each diaper and lighter colored ribbon.


Step 8
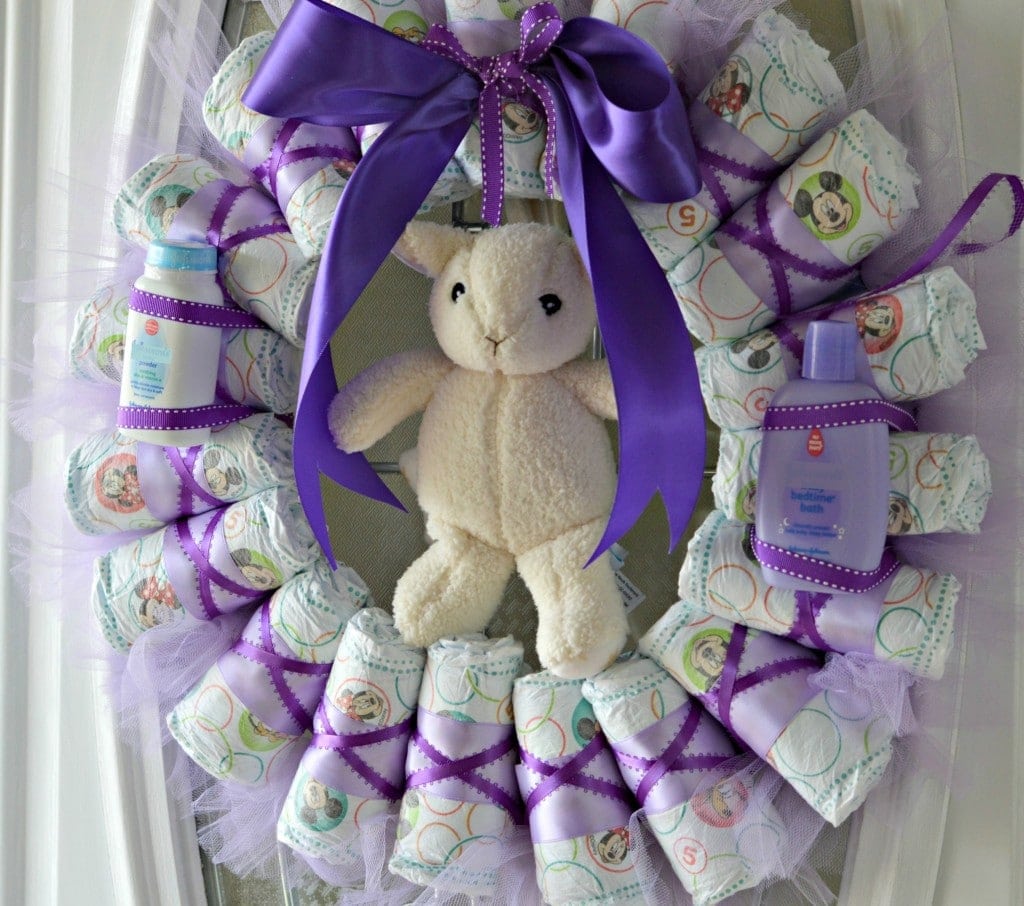
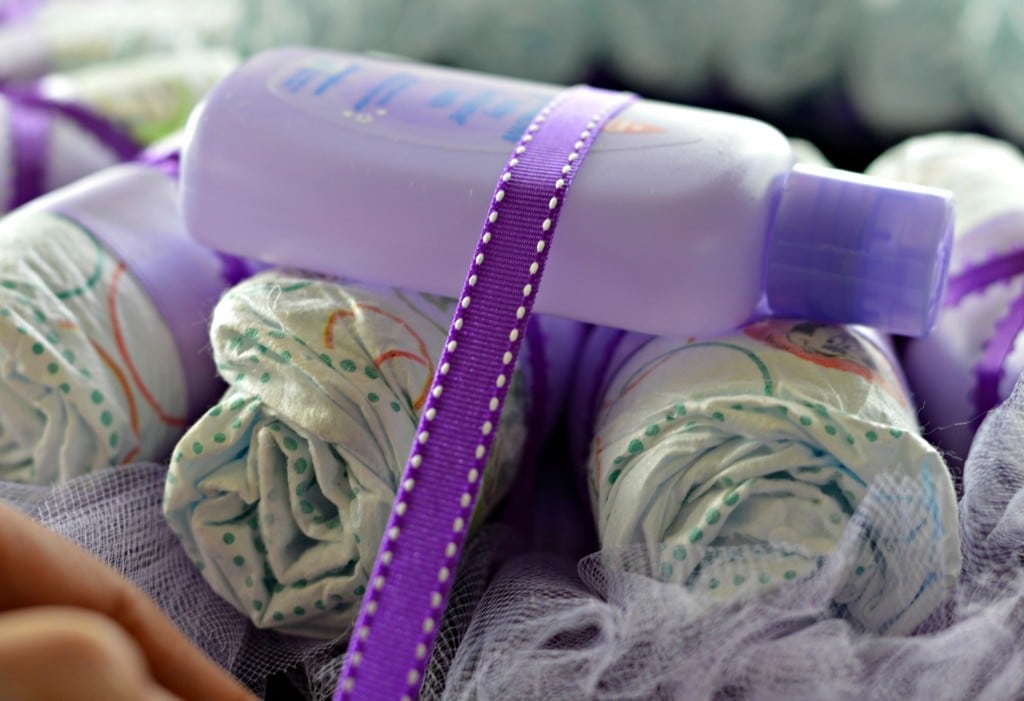
You are almost finished! To hang it up, simply glue a piece of ribbon on the back in the form of a loop and it’s ready! Now you can add toys, baby shampoo or oil, stuffed animals – here are some great choices, or whatever else you want to add. Just use your imagination!

Materials:
- 20 Huggies Snug & Dry Diapers (size 5 – smaller sizes may require more)
- Glue Gun with Glue
- 2 Cardboard Rings (14.5 inches from the outside edge to outside edge, and 10 inches from the inside edge to the other inside edge).
- Acrylic Paint or Wrapping Paper
- Approximately 6 yards of 1 1/2 inch ribbon in the color of your choice (I used purple). I buy most of my craft materials at Joann, as they have a great selection of almost anything you could need. You can shop online at Joanne.com.
- Approximately 10 yards of 3/8 inch ribbon in a darker version of the first color.
- 40 yard roll of 6″ tulle
- Stuffed animals, other toys, and baby products to decorate.
I hope that this tutorial has been helpful for you and I would love to hear in the comments how your’s turned out!
DIY Baby Shower Banner
Thursday 21st of April 2016
[…] seen diaper cakes (like this one I made a few years ago), or you might have seen this adorable Diaper Wreath Tutorial from my sister-in-law. I think they are nice decorations that are a functional gift at the end of […]
Judy Maranger
Tuesday 29th of March 2016
I am going to a baby shower on April 10. The couple is expecting twins… a boy and a girl. I am going to make this for sure, using pink and blue ribbon. I have one question. How are the baby oil and powder attached? Are you gluing extra pieces of ribbon to the back and bringing them to the front to attach the items, or are they attached by the cross ribbon which is over the diaper? I can't tell by the picture. This is very cute, and I am sure they won't get another one like it. Thank you for sharing.
Sue Anderson
Tuesday 29th of March 2016
This is just precious, I have a new Great Granddaughter due in Sept. and I will for sure be making this to take to her shower and then maybe she can hang it on the babies bedroom door for awhile.
Bernice
Monday 28th of March 2016
This is adorable. I used to make Diaper Cakes and tryed a wreath once. Now that I see yours I will try a wreath again. Thanks for sharing! One question.... How did you attach the Teddy bear to the middle?
Charbel Barker
Tuesday 29th of March 2016
Thanks for checking it out! The bunny had a loop on the top, so I just used a little bit of glue to attach a small piece of ribbon to the underside of the wreath and tied the ribbon to the loop. Hope that helps! :)
Theresa Sutton
Thursday 24th of March 2016
I absolutely love this and would make a great accessory at a baby shower!
Charbel Barker
Friday 25th of March 2016
Thanks Theresa!