Para Español, Haz Click Aquí.
Easter is almost here and we are still decorating! If you missed our DIY Centerpiece and No-sew Easter Pillow tutorials, make sure to check them out. They go perfectly with these wooden Easter Bunny decorations!
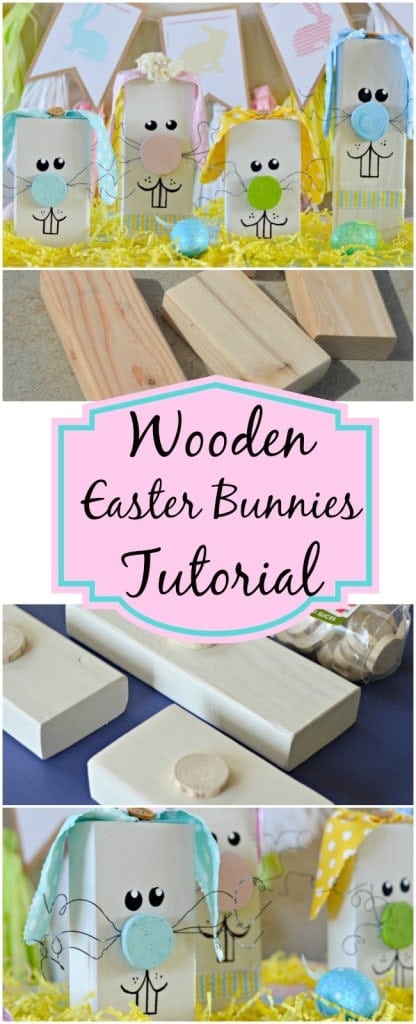
With all of these sunny days that we have been having, I have had more energy and motivation to work on these fairly simple projects using leftover wood from other projects to save a little bit of money. As soon as I decided what I wanted these to look like, I went to the start to find some inexpensive, simple materials and set to work getting our house ready for Spring. Don’t worry about not having much time – you can do this entire project in less than 2 hours!
Materials
- One 3 foot long piece of 2×4
- Thin Wire
- Acrylic Paint
- Wood Slices
- Paint Marker
- Small amount of fabric in the color of your choice (polka dots are perfect!)
- Other assorted decorations like bows and ribbons, if desired.
- White primer or other paint.
- Circular Saw
- Electric Sander
- Pinking Shears
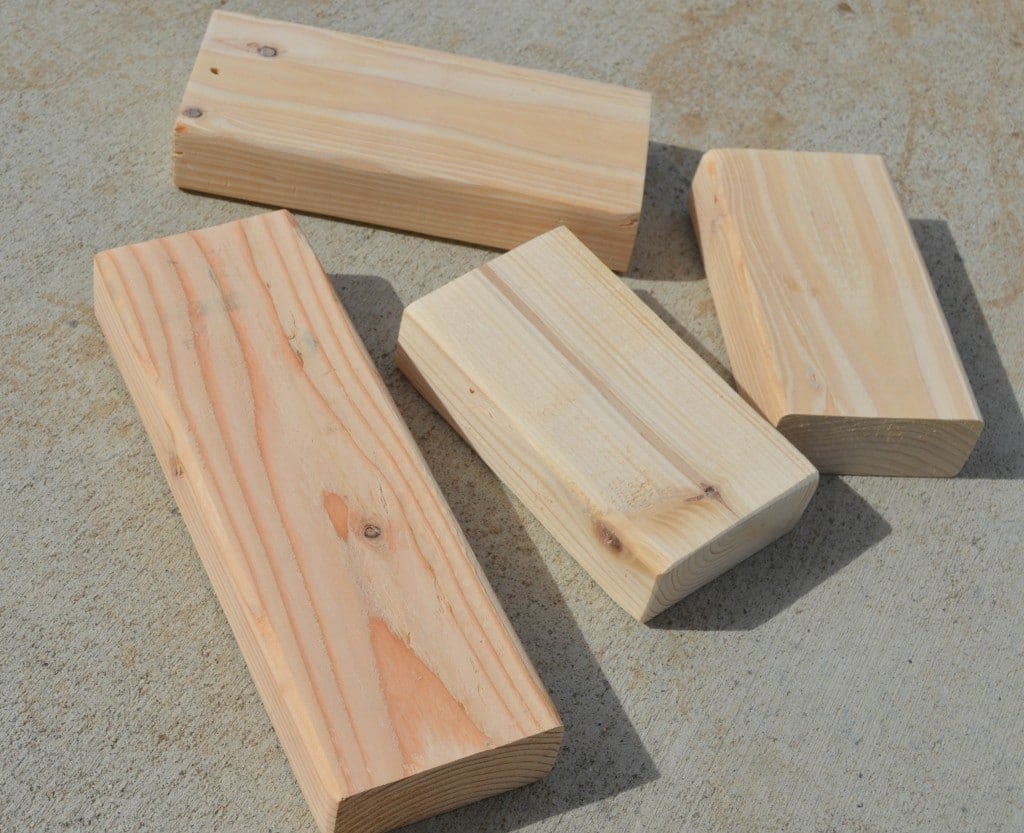
Step 1
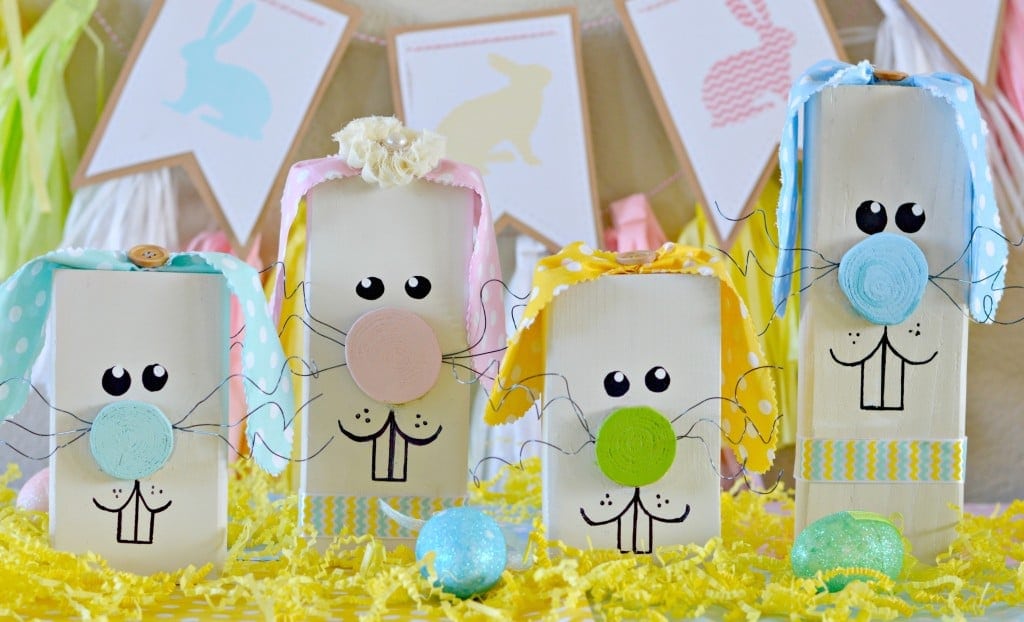
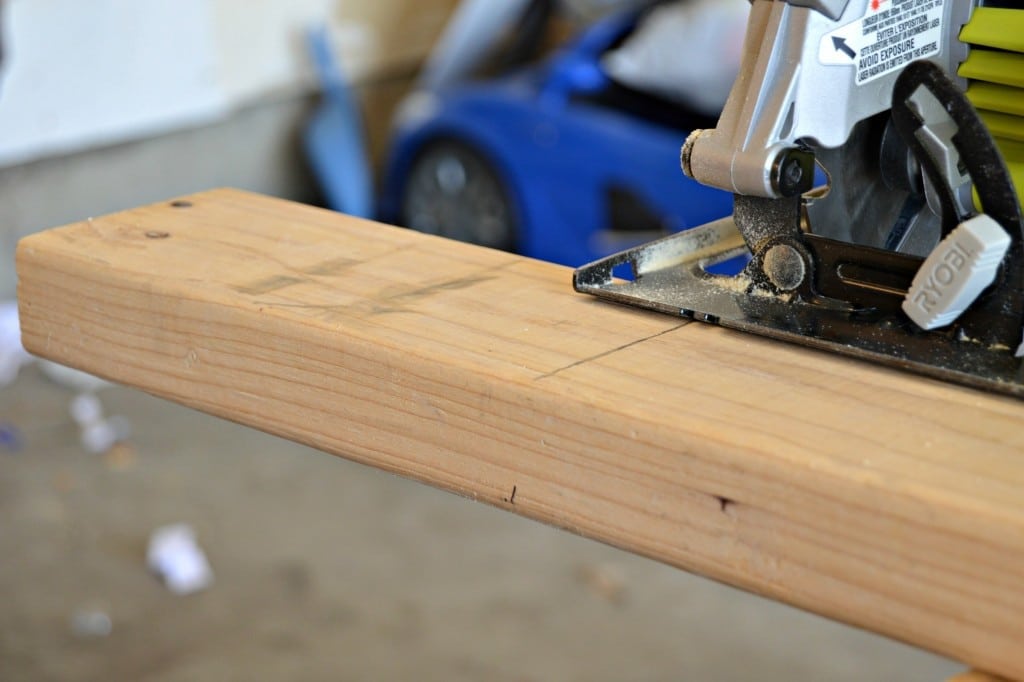
The first step is to cut the wood into the sizes that you need. The wood that I used is a little bit thick, so you will need a good circular saw like the one that we used. You can cut them whatever length you want – I cut one that was 10 inches, one that was 8 inches, and two that were 6 inches to represent my husband, myself, and our two little boys.
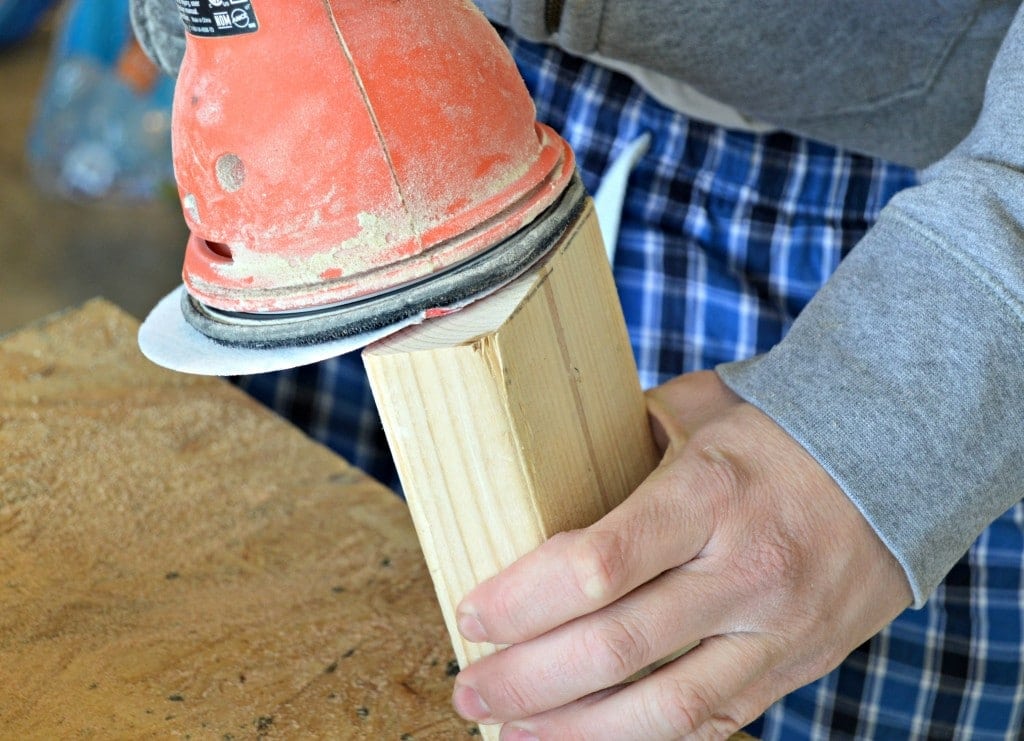
Step 2
Once you have cut the wood to the correct lengths, make sure to sand them so that they are smooth and so that you can get rid of the rough edges. Then be sure to wipe the excess dust clean.
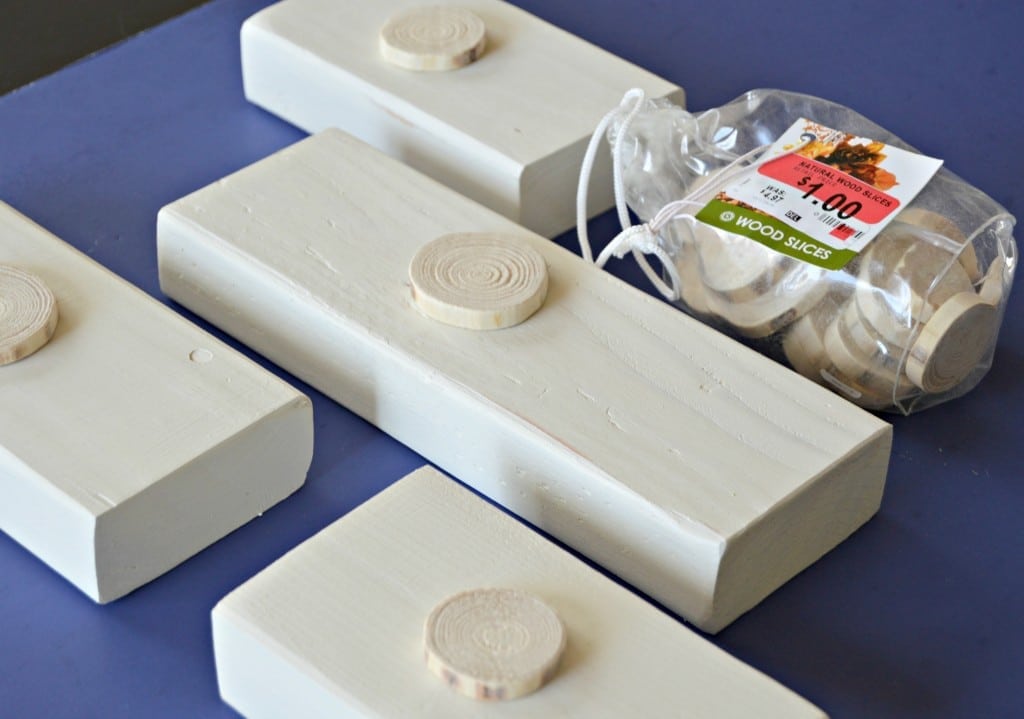
Step 3
Once cut and sanded, it is time to paint. I used white primer that I had on hand, but if you want to spend a bit more you can always buy some good wood paint. I decided to use what I had, because like I have mentioned in the past, I like doing inexpensive, yet really cute crafts! For the nose I found these perfect wooden slices for 1 dollar!
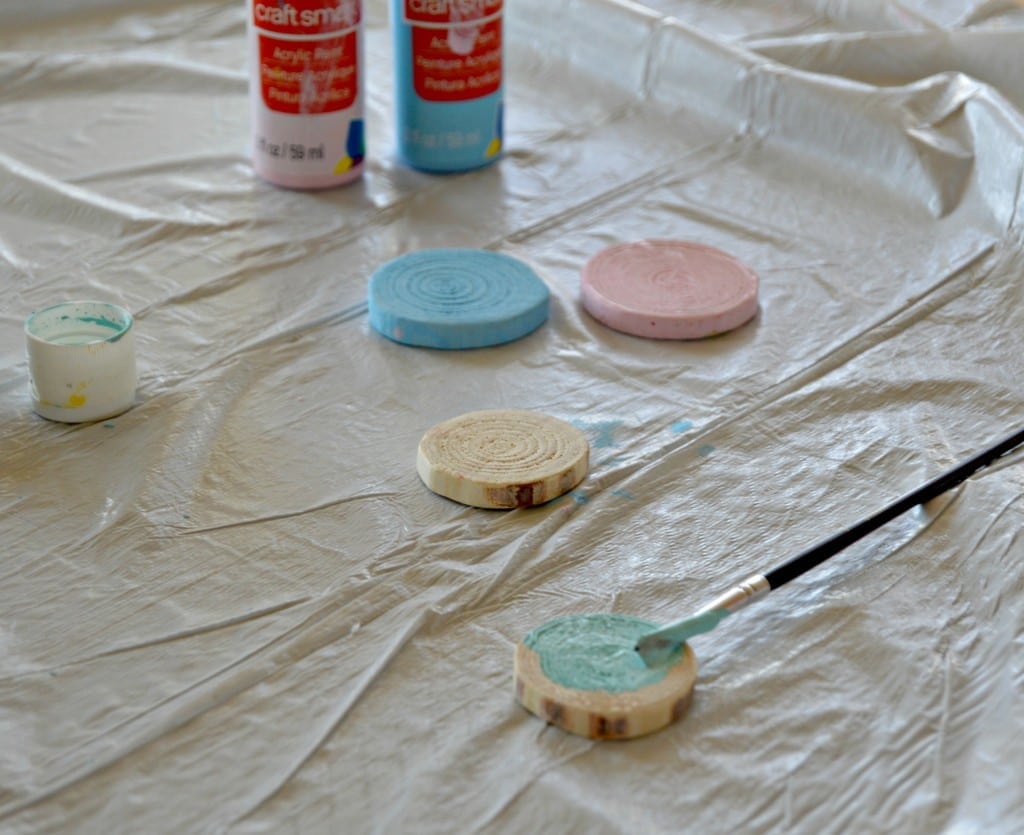
Step 4
While you are waiting for the white paint to dry, it is time to paint the noses with acrylic paint according to the color of fabric that you are going to use for the next part.
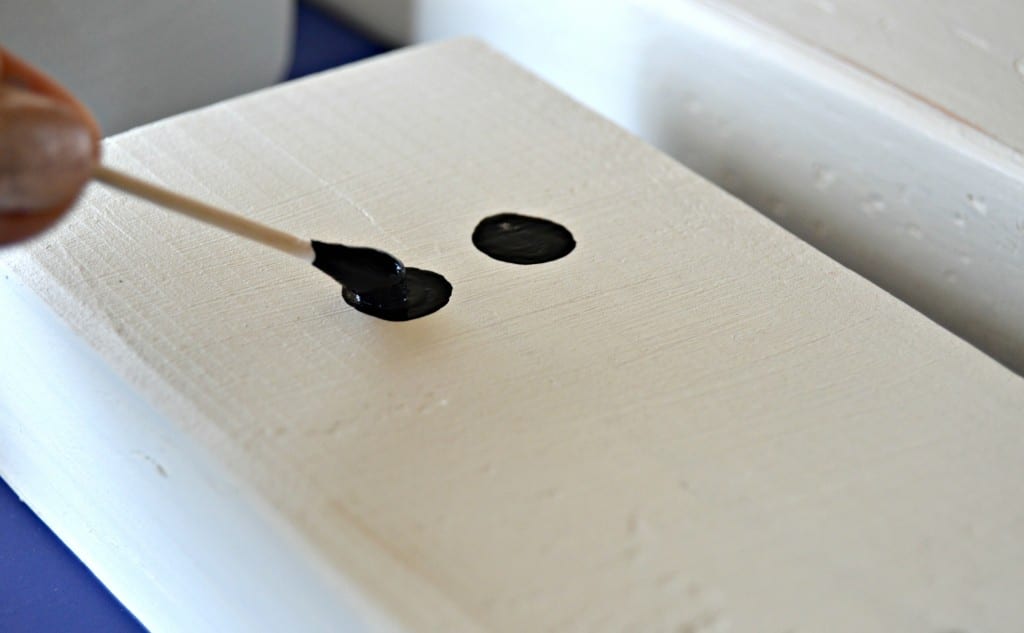
Step 5
To make the eyes, use a cotton swap to paint a small black circle on the now dry block of wood. After the black circle has dried, paint a small white circle to finish the eyes.
Step 6
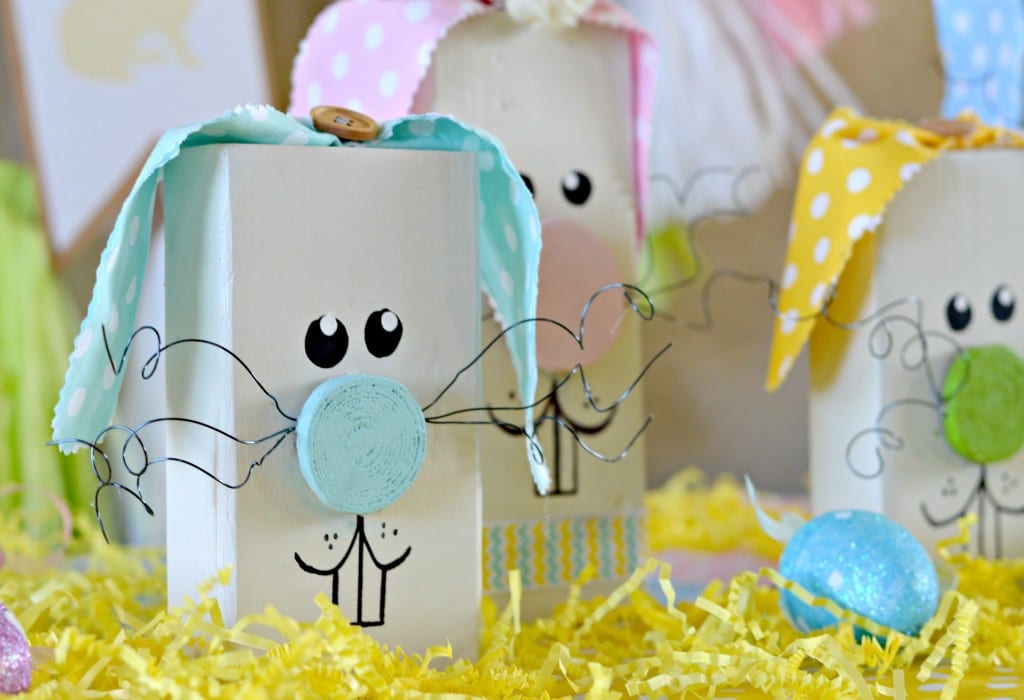
The next step is to take out your Pinking Shears and cut two 14″ x 2″ rounded strips of your choice of fabric. Put the inward-facing sides together and then use some needle and thread to tie the middle as shown in the pictures below. Use hot glue to glue it to the top of the block and add any other bows or other decorations that you want.

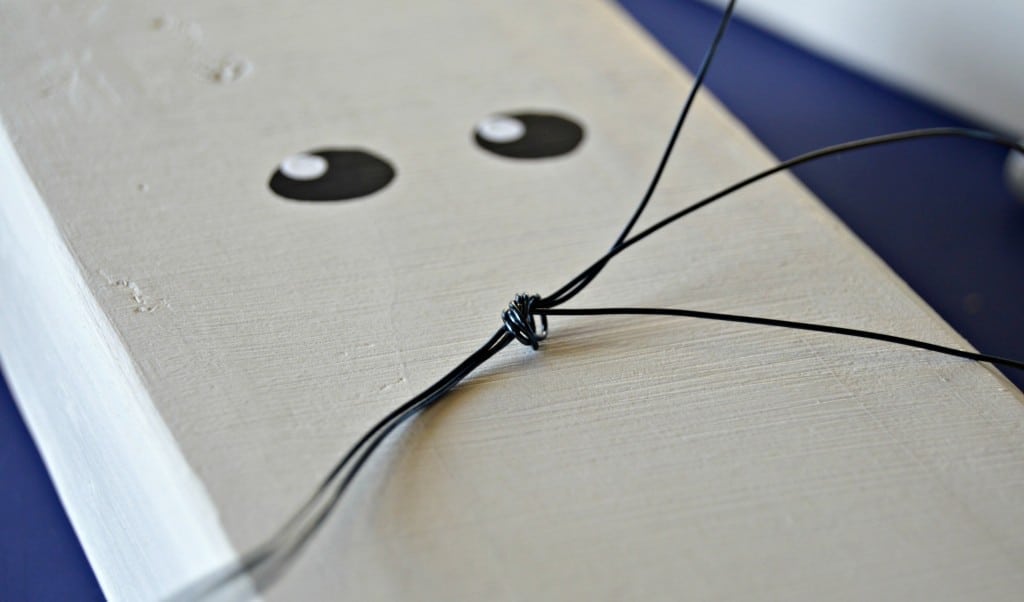
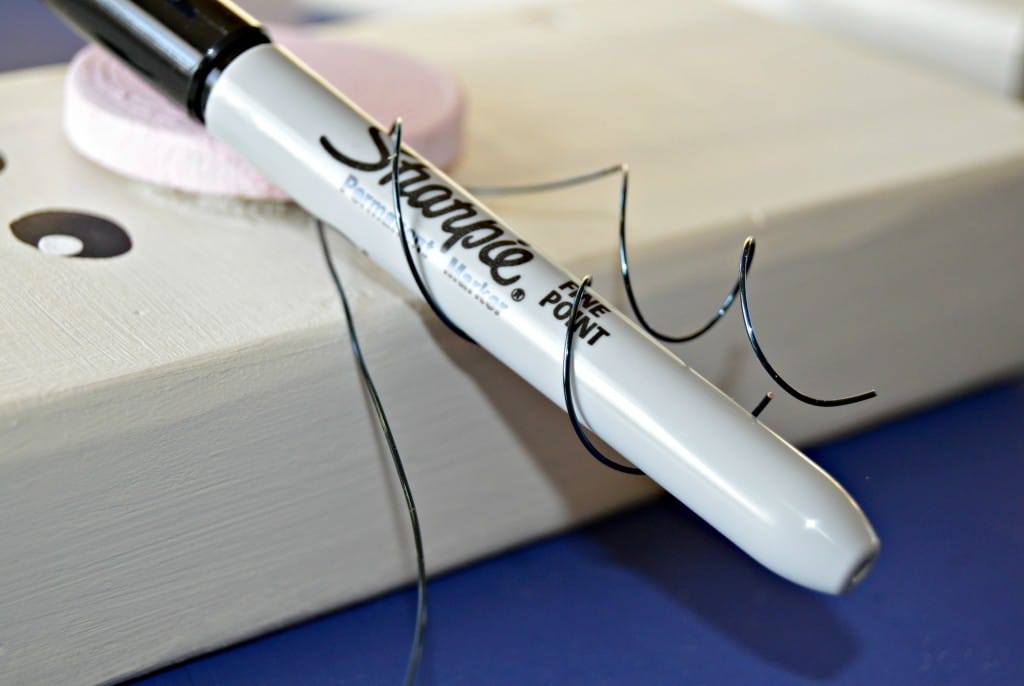
Step 7
The next step is to make the whiskers. Fo this you will need thin pieces of wire and wood glue. For each bunny, cut three pieces of the wire to equal lengths, put them together, and tie a knot in the middle. After you have tied the knot, put it in the middle, about where the nose will go and attach with your wood glue. Then put the nose on top, pressing down firmly so that it is glued in place as well. Once the nose and wire are in place, use a pen or marker to form the whiskers. Now you can add more decorations, like bows and buttons or whatever else you think will look great!
Step 8
The final step is to draw on the mouth and the teeth and adding a little bit of color to the cheek area.

I hope that you have enjoyed this tutorial and that you will try it too! Let me know in the comments how it turned out! These are a perfect way to decorate your house or it would be a great gift for a friend or family.
Linda Brown
Monday 25th of March 2019
Super cute. I love these. I will be making some today. Quick and easy. Thanks for sharing this.
Pat
Wednesday 23rd of March 2016
Totally adorable!
Charbel Barker
Friday 25th of March 2016
Thanks Pat! I'm glad you liked it.